Category: Uncategorized

How to set up an effective YouTube channel

YouTube isn’t just a video-sharing platform. It’s become the world’s second-largest search engine. With so many people searching for content of all kinds on YouTube, it’s a huge opportunity for businesses to attract more eyeballs and grow really quickly. 

Video is a super engaging way for brands and influencers to connect with their audiences directly — but there’s a catch: your channel has to be set up for success to give you the best chance of being picked up by search engines and algorithms. That’s how you draw people in!

Let’s break down how to set up the perfect YouTube channel. You’ll want to use YouTube Studio for all of your channel, upload, and management needs. Be sure you’ve set up what YouTube calls a Brand Account so you have all of the capabilities.

*Don’t feel like reading? Watch the video below!*

1. The basics

It might sound obvious to say you need a channel name… but stick with us. Your channel name needs to reflect your brand, but it also needs to be SEO searchable. Make sure your channel name is something people will search for when they’re looking for you online. 

You’ll also need a channel profile image sized at 800 x 800 pixels. Depending on your business, a logo or photo of you works great!
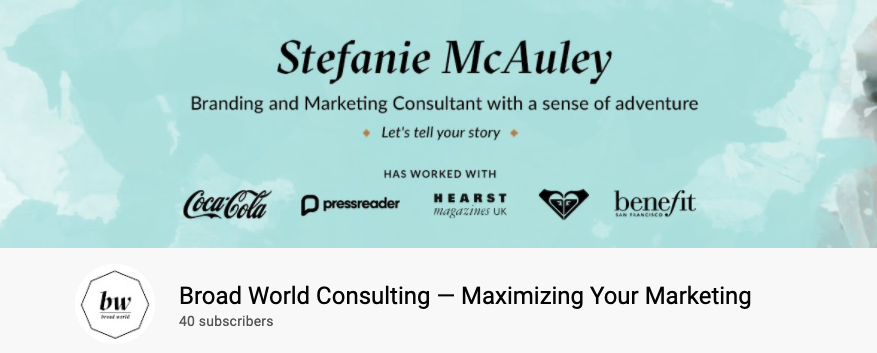
Tips for YouTube channel setup
Make sure to set up your channel name, profile image, and header image.

2. Header imagery

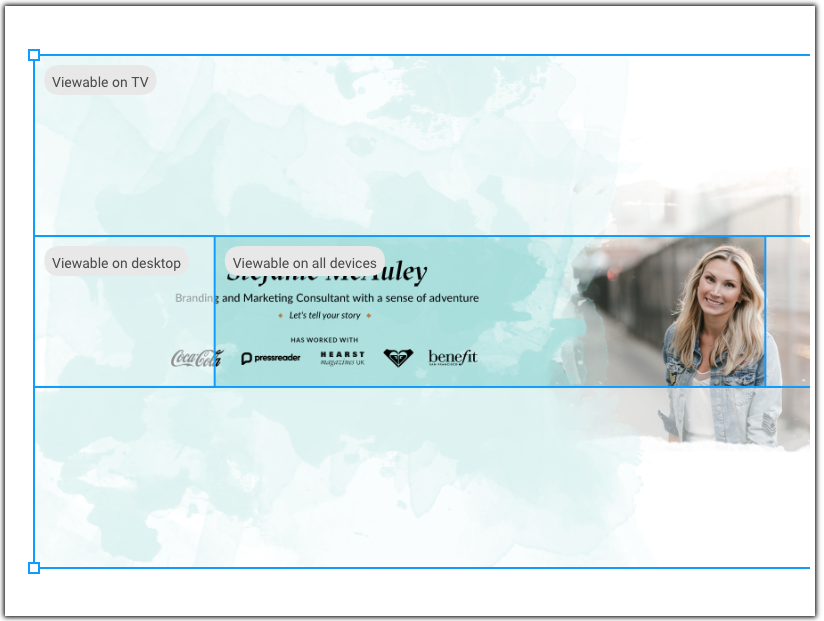
Your header image is a huge piece of real estate that you can use to communicate with your audience. Rather than sticking to just pretty visuals, use this to tell your audience something about your business. Things like what they’ll learn from your channel, your value proposition, or even how often you post videos. 

The overall header specs for YouTube are 2560 x 1440 pixels, and your header should also be optimized for smart TV, desktop, and mobile.

YouTube channel setup
A YouTube channel header image should be 2460 x 1440 pixels, with optimized design for different devices.

3. Channel description

Your channel description is where you’ll tell people who you are, what you do, and what your audience will take away from your videos. You’ll want the first 100-150 characters to hook people in! Because of truncation (formatting YouTube does to shorten a write-up), these first few sentences are what people will see before they’ll have to click to expand the rest of the description. And yes, the rest of the description is just as important — be sure to use strong keywords for SEO. 

4. Choose your channel layout

There are many ways to personalize your channel. This includes creating playlists on specific topics, moving seasonal content to the top of your channel, or simply highlighting key branded content. Be sure that you’ve optimized how viewers see your space and that it aligns with your marketing goals.

5. Create two channel trailers

YouTube has added a ton of cool new features over the years to give creators the tools to grow their channel. One of those features is channel trailers. Think of this like a mini movie trailer for you and your business. 

You’ll need two trailers: one for current subscribers, and one for people who have never seen your channel before. Don’t worry, all you need to do is upload and YouTube will take care of pushing the right trailer to the right eyeballs. 

6. Engage with DM’s and sticker replies

As you grow your channel, people will want to reach out to you. So make sure you give them a way to do that. Plug in your contact email under the ‘About’ section of your website to help your audience and other businesses in your industry connect with you. 

We’ve said this a million times and will say it again: YouTube is a SOCIAL media channel. It relies on you to not only create amazing, indexed content, but also engage with other creators on the platform. So get social! 

Are you adding YouTube to your content strategy? Let me know in the comments below. 

How to use LinkedIn as a sales tool

LinkedIn is so much more than a job-finder or talent acquisition tool. Like other social platforms, LinkedIn gives people a place to connect, share ideas, and build relationships with likeminded people. Let me repeat that LinkedIn is a social platform — one with a professional lens.

For a salesperson, LinkedIn is an amazing tool to introduce yourself to others, position yourself as a thought-leader, and have clients find you!

Below are the steps to setting up a notable, discoverable profile. One that will turn your expertise into leads. 

*Don’t feel like reading? Watch the video.*

Optimize your profile

First thing’s first: your profile. Not only is this the first thing people see when they click your name, but it’s also driven by keywords and other important factors that will get you discovered.

Make sure to have:

  • A professional profile picture. Ideally headshot style, bright and recent, warm and personable, no cocktails in hand. (Unless you’re a booze rep!)
  • A personalized header image. This could be a company branded graphic or a photo of the amazing balcony view from your favourite hotel in Cabo.
  • An up-to-date headline. This is your two seconds to tell someone what you do before they scroll down to read more or decide to exit your profile altogether.


Crush that ‘about’ section

Chances are you haven’t updated this since you were looking for a job, in which case it would have been used like a cover letter. But now, it’s about growing your business, building trust, and breaking the digital barrier so people know what it’s like working with you. 

This is your opportunity as a sales professional to create a strong sales funnel with a personal touch. Take your headline and expand that. Tell the reader who you are and what you do with a mix of personal and professional detail.

Get recommendations

The ‘recommendations’ feature on LinkedIn is a bit underrated, mostly because it’s often at the very bottom of most profiles. You might not even know it exists! (Pro tip: You can move this section up in your profile page.) You want potential customers to know how amazing you are to work with — so find it, and use it to reach out to three people in each of the following categories:

  • Current colleagues. Reach out to two or three colleagues, offering to write one in return. Remember to phrase it in a fashion that you want to update your profile to attract more clients to the company. You are not job-hunting.
  • Personal connections. This can be a bit tricky because you want the recommendations to be more than, “My daughter is amazing!” When reaching out to personal connections, consider those who you’ve worked with in some capacity, like a volunteer project. This is a chance for your biggest cheerleaders to talk about your character and the kind of person you are.
  • Past clients. Testimonials from past clients are valuable currency. Don’t be afraid to reach out. An example: 

“Hi [past client], it was great to work with you on the [project] for your company. If you could take a moment to leave a recommendation of your experience of working with me at [company], I’d appreciate it. I’d be happy to return the favour!” 

Curate your connections and who you follow

Follow leaders, influencers, competitors, topics, and key brands in your industry. Why? So you can engage! Engagement is so important. Remember, it’s called social media.

From the connections you make, your newsfeed will populate with posts from industry leaders. Like, make a thoughtful comment, and share to boost your connection so others can see the post.

Get a seat at the table

You have a lot to share, so don’t be shy — share! Dovetailing from your curated connections and engagement, now it’s time to show your expertise. This can lead to opportunities outside of sales, like speaking opportunities that can shine a light on you and your company.   

  • Get involved in industry and other relevant conversation by sharing articles — remember to include a comment on why you think it’s interesting. 
  • Take your marketing departments initiatives like blogs and share them with a lens from your role or territory
  • Answer the FAQs your customers have
  • Offer value and tips to grow your notoriety

Remember the rule of thumb:

3-5 shares per week, and two 15-minute sessions/day of engagement.

The point here is to show that you are a leader in the industry and that you’re a real human being. This will make people curious about who you are and get them to click on your profile page. If you’ve optimized your profile with the tips above, you’re sure to pique interest in the right audience and customers.

Think of Linkedin as your digital conference space. It’s free, the resources and leads are plentiful, and it’s an ideal networking space for sales professionals. The key is to be social.

*Head over to our blog for more tips on personal and business branding and marketing.*

How to feel confident on camera

Watching and hearing yourself on camera can be an awkward experience to say the least. The overanalyzing, picking at small details, cringing at the sound of your own voice… We totally get it. Speaking to a camera can be uncomfortable. But we also know audiences are looking to connect with brands that are real and human. Video is one of the best ways to break down that digital barrier, tell your story in your own words, and ultimately connect with your audience. But feeling confident on video takes practice.

Let’s talk about how to get out of that awkward headspace and step into your on-camera confidence.  

1. Arrive prepared with a clear goal in mind

You’re making videos for a reason — so make sure the ‘why’ is clear to you and your audience. Before you hit record, have a clear understanding of the goal of your video. Is it to make an announcement? Communicate a new offer? Just check-in with your followers? It sounds basic, but a clear goal for every video will keep you on track.  

2. Write an outline, not a script

While a script might seem like a good idea, it can often work against you. Scripts can feel robotic and shatter your confidence every time you miss a specific word. Save yourself the frustration!

Instead, write down your main ideas in point form. Once you’re in front of the camera, speak to each point, and move onto the next. You know your stuff, and this more natural way of speaking will ensure that’s clear to the audience. 

3. Show up feeling put together and confident

What makes you feel your best? Steaming your button-up? Putting on lip gloss? Styling your hair? Whatever it is, do it! How you present while filming is completely in your control.  Knowing you look and feel good will be one less thing to worry about when you hit the Record button.

4. Get your nervous energy out

Nervous energy is completely normal in front of the camera. It may sound silly, but you can physically shake those jitters out. Here’s our go-to: plant your feet hip-width apart and shake your whole body until you feel more settled. And don’t forget to breathe! There are a ton of different breathing techniques that instantly calm your body.

5. Physically ground yourself

Speaking of planting your feet, this is another way to ground your body during filming. Plant those feet with your weight equally distributed and sit in your full power. Not only will this avoid awkward shifting, but it’ll portray your confidence in a physical way that’s obvious on camera.

6. Keep eye contact

Think of the camera like a member of your audience. Look directly into the lens and make eye contact in the same way that you would in person. Because after all, there’s always a real person on the other end of the video.

7. Speak slowly, clearly, and with authority

We have a tendency to rush when we’re nervous, so speak slow and clear enough for the audio to pick up your words. This will avoid playing an unwanted game of Telephone with the audience.

8. Start talking with non-scripted dialogue

Another great way to get those jitters out! Speak straight to camera about something you never intend to post. You can talk about anything at all! Like what you had for breakfast that morning, or the plot of that new awesome Netflix show. Do this during the first few moments of filming get into a more natural groove.

9. Mistakes are A-OK

You’re going to make some mistakes along the way. It’s inevitable and more than okay. So don’t beat yourself up for stumbling over your words or saying the wrong thing. Those subtle blips are what humanize you and make you relatable. And the great thing about video is that YOU have control over the final product. If you really messed something up, just cut it out. No sweat.

10.  Speak to ONE person

This is a big one for engagement. Use the word YOU in the first 5 seconds: you, your, or yourself. These variations of the word hold a ton of power and can increase your engagement by 68%.  Yup, you read that right. Remember, there’s often only one person on the other end of your video — so speak to them as they are, in that live moment.

11.  Cut to the chase

We don’t mean you should skip the basics. You should always give a quick intro and let your audience know what they’ll get out of your video. But once you’ve covered those bases, jump right into the bulk of it. No one wants to sit through a long video for just a few minutes of actual value-adding content.  

12.  Don’t be condescending

The people who watch your videos are probably there trying to learn something from you. Avoid hitting them with these types of sentences:  

  • Do you get it?
  • Does that make sense?

While it’s definitely not your intention to come across in a condescending way, phrases like that imply your audience isn’t keeping up — even if they are. We want to make them feel like it’s okay that they’re not well-versed on what you’re teaching… because it is. That’s why you’re there to educate on your expertise.

Try these phrases instead:

  • Do you have any questions?
  • Do you have any feedback for me?
  • Did I leave out anything that you’re curious about?

We’re a firm believer in video over here at Broad World. Why? It’s grown our business, engagement, and the connection between us and our audience. We know it’s not easy at first, but getting comfortable on video is like working a muscle — you have to use it to see improvement. And remember, your audience is there for a reason. They want to connect, and they’re on your side.

You can and will feel confident on video. Get started TODAY — right where you are.

For more branding and marketing tips and tricks, visit the BW Biz Blog.

Save money and valuable time with a photoshoot shot list

A shot list is a critical part of any photoshoot — be it for social content, product shots for your site, lifestyle imagery, or any other visual campaign. A shot list outlines the who, what, where, when, and why of your shoot to keep you on track with your time and budget.

If you forego the shot list, you’ll end up getting back to the office with photos that don’t fit where you need them, aren’t aligned, are all the same — or worse, missing altogether.

Here’s our quick breakdown of how to nail a shot list, save yourself time during shooting, and getting the most images you can use out of each photoshoot.

Don’t feel like reading? Watch the video!

Highlight your business goals

Marketing rule numero uno: always, always, always understand why you’re doing each initiative. Go into your photoshoot with your goals not just in mind, but written down too. Make sure they’re clearly communicated to the whole team so the vision is clear, questions are asked, and you’re all fighting the same battle.

Two questions will help you identify those goals. One: Where will these photos be placed? Two: What actions do you want people to take when they see them?

Refer to your content calendar

Your content calendar can help you guide your shots. Take stock of upcoming dates of importance, product launches, and the pieces of content you’re creating.

Note: Capturing some evergreen shots is always great, too. Don’t shy away from taking a few shots you save for a slow week, generic marketing materials, or times you need a solid, branded image.

Break down your important categories

These are the big categories that will structure the order in which you shoot. Maybe you have a couple of different locations, maybe you have two rounds of models, maybe you need different equipment for the types of shots you need — highlight these time-consuming changes as the overarching pieces.

Break your categories into smaller parts

Break each larger category into smaller sections. If you have a model for one hour, break down which outfits they’ll be wearing when. If you have a bunch of product shots on one background, schedule those together before changing scenery.

The key here is to do the majority of the planning before you arrive into the mayhem of the day.

Think about where images will be used

I can’t tell you how many times I’ve kicked myself for getting too many vertical shots when I needed a horizontal one for a certain blog post or thumbnail. Each digital platform or print material requires different parameters for your images. Here are a few things to consider:

  • Orientation — landscape vs. portrait
  • Resolution — how high or low quality is best
  • Macro vs. micro shots — how zoomed in or zoomed out an image is
  • Backgrounds — for website product shots it’s important that you can remove the background

Break down realistic timelines

Now that you have your categories, subcategories, and types of images you need to check off the list, it’s time to build your timeframe. The beginning of a shoot always takes a little longer than you think to get rolling, and the end of a shoot always feels a little frantic.

Don’t do that to yourself. Marking the times along each section is a great way to make sure you’re staying on track and can set priorities if the wheels start to fall off.

Pro tip: like a budget, always inflate your times by 20-30% to allow for human error, wardrobe or equipment malfunctions, and general mishaps.

Note all necessary props

Since you’ve thought meticulously about each shot, you know what will help bring those images to life. Maybe it’s a picnic setup complete with a blanket, wine, cheese, and a bougie picnic basket. Or florals and/or crystals to enhance your product shots. Perhaps it’s accessories that bring your clothing to life.

Whatever it is, make a note for the shot it applies to so you don’t forget in the craziness.

Prepare everything beforehand

Props are great. We love props. They really help tell a brand’s story. However, make sure everything shows up to the shoot camera-ready.

  • Sneakers are clean
  • Inflatables are blown up
  • You’ve tested to make sure new items work
  • Clothing is steamed and hung
  • Accessories are in baggies and attached to the outfit they go with

This seems obvious, but I can’t tell you how many times I’ve seen accessories be missed, props didn’t work, or clothing looked like it had been pulled out of a dirty laundry basket.

Measure twice and cut once, friend.

Pack an on-set kit

Shit happens. Be a good boy scout and always be prepared. These are the go-tos in our kit:

  • scissors
  • thread and a needle
  • double-sided tape
  • safety pins
  • baby wipes
  • paper towel and soft rags
  • Windex
  • Tide-To-Go pens
  • water bottles

Remember, these are the fun days! Get all of the planning and organization out of the way before you arrive to set. A photoshoot shot list will give you the day-of brain capacity to manage people, products, a timeline, and the budget. And actually enjoy a creative day!

Creative strategy and organization aren’t for everyone, so this all might sound terrifying to you. If so, we’re here to help! Reach out to us for any of your branding and digital marketing needs. Let’s go for a coffee — on us!

Get the full scoop on Instagram Reels

Just when you think you’re getting a grasp on your Instagram content, they throw another feature at us: Reels. Reels are 15 second video clips shared to your feed and new Reels page, offering up new brand-building initiatives.

How is it different from Stories, IGTV, or umm, TikTok? That’s what we’ll run through today.

*Scroll to the bottom of this page to watch the video*

What is Reels?

Instagram Reels are <15 second videos that will be housed in a new icon on your profile page between your Feed and IGTV. These 15 second videos can be created and shared in real-time a la Stories, but can also be created by uploading a video or multiple videos. Reels offers features like music, filters, and stickers to bring your storytelling to life.

Unlike Stories, Reels won’t disappear from your account in 24 hours, and will stay on your Reels feed. Reels aren’t meant to be super polished, but rather a glimpse at your brand’s personality with quick-to-social creative.

So yes, Instagram Reels is Facebook’s clap back to TikTok. But it’s way more than that, too.

Why did Instagram add Reels?

From January through March of 2020, TikTok had more app-installs than any company had ever seen in a single quarter. Proving further what we already knew to be true: video content is queen! Video engages followers — which builds trust, brand loyalty and community.

While Gen Z were undoubtedly the early adopters of TikTok, millennials now account for the highest population of TikTok users. Not because Gen Z has fallen off, but because their slightly older cohorts have also taken on the quirky, roughly-edited way video content is being brought to them. Instagram’s win here is that they have a whopping 1 million users, so this new feature will bring the people what they want, in a place they already are.

Editorial staff have known for a long time that written content is mostly consumed in snack-sized pieces or long form. This is proving true in the world of video as well. Instagram took a page out of Vine’s book with Stories, it’s coming for YouTube with IGTV, and here we see them again using their mammoth user base to maintain their market share over TikTok.

How do you use Reels?

For a straight-up tutorial on Reels, I recommend checking out Later’s post. I want to dive into the strategic side.

Reels are your opportunity to show the human side of you and your business. If you take nothing else away from this post, let it be that. We connect with humans and the human experience. Maybe your brand is funny, or relaxing, or motivating, it doesn’t matter. So how you use Reels should be raw and authentic to that story.

Here are some ideas that would make engaging, storytelling videos:

(Important: keep in mind we aren’t after perfection)

  • BTS of a photoshoot, great way to tease products or launches
  • Meet the team or in-office happenings, to promote talent acquisition
  • Tutorial videos to elevate your expertise, this could be styling, stretching, skin care, changing a faucet!
  • Before and after ideas, everyone loves a transformation
  • New arrivals or products
  • Routines, recipes, funny animals, chubby babies, jokes… honestly, you name it!

As I said above, Reels will be its own tab on your profile but I’d like to add that sharing a new Reel to your Stories and previewing it on your feed is the best way to get the most views.

What are the benefits of Reels?

I’ve heard from clients that the addition of Reels feels like another task in their already hectic lives. And I get it. But, this is a great time to take stock of what marketing efforts you’re putting in and which have room for improvement. Reels is still in its infancy, and is already offering up a lot of value:

  • 1 billion Instagram users: while they don’t all follow you, this app has the most eyeballs
  • Reels has (proportionately) very little content on Instagram so far, this is a great time to capture a new audience
  • You don’t need high-quality video budgets: they truly don’t need to be perfect, just engaging
  • It’s simple video content! (See above)
  • All editing can be done right in your 

More than anything, for me, this is an opportunity for you to build a loyal following and client-base. I’ve said this before and I will again, and again — you are your biggest superpower. You don’t have any issues when a customer walks into your shop/office/studio, but putting yourself out there online is scary! Remember, there are hundreds or thousands of competitors in your area, so breaking that third wall and letting people get to know you is critical.

If you aren’t doing it, they will. Sorry.

Should you be using and creating Reels?

Reels should sit naturally into your content calendar — remember my golden rule about not forcing content!

“Content is like a fart, if you have to force it it’s probably $#!t.”

~ Moi

***

If you’re still feeling a little lost in the world of Instagram Reels, that’s OK. I suggest spending some time in Reels as a user to grasp it from the audience perspective. What do you like? What grabs your attention? What kind of content are other people creating?

Don’t forget, you can always book a free consultation with me if you have questions. Or we can go for a fancy a coffee.

Take quality pics with your iPhone

No matter your business, images on social media, your website, and other touchpoints really tell your brand story. 

There are more than 95 million photos and videos that are uploaded to Instagram alone each day. Your images need to break through the noise and be as top notch as your business.

The benefits of using a smartphone to create visual content are the cost savings, quick-to-post content, and not needing the expertise to shoot/focus/edit with a DSLR and clunky software. (But keep in mind, there’s a time and place to invest in your business and hire a pro.)

These are my favourite tips, tricks and tools for taking quality pics with your smartphone.

*Scroll to the bottom of this page to watch the video*

1. Lighting is key

A key mistake people make is taking images with poorly balanced lighting. This casts shadows and makes image editing — even with a stock filter — challenging. It will also make parts of the photo hard to see. This is a real bummer for products, clothing or real estate, where key selling features need to shine. 

Here’s how to mitigate this in different scenarios:

  • Outdoor: Never shoot in broad daylight. Instead, shoot in a shady spot, just after sunset, or on a cloudy day.
  • Indoor: Use a ring light or shoot in a well-lit room that doesn’t have direct sunlight. Face towards the light source so that you’re getting light evenly on you or the product.
  • Product shots: Place products next to a window. Ring lights can work here but often reflect on products with any metal or glass.

2. Lifestyle shots should be natural

No matter what you’re promoting, lifestyle shots are so, so, so important. I love storytelling, and a photo is the perfect way to show the audience the value of your product in a snap second. Be sure to keep lifestyle shots natural so they don’t look like cheesy stock photos you found in a quick Google search.

Pro tip: Shoot while moving so there’s a bit of energy to your image: walk, spin, sip, bite, laugh, ride.

3. Product shots should be thoughtful

Of course product shots should be clear and minimal on an ecommerce page, but when you’re shooting for your social channels be sure to add a little lustre and storytelling. (Duh, of course this is my advice!)

If you’re shooting a candle, place it somewhere your buyer would love to relax like a bubble bath. Shoot with a close up of the branding and a blurry background of the tub to emphasize the product and add some romance to the lifestyle.

When doing flatlays for social, add in some texture with still life or a piece of fabric. Layer in elements that tell the brand story, like a book and a towel alongside the sunglasses you’re selling.

4. Familiarize yourself with your smartphone’s features

Phone cameras keep getting better and better. As I said above, the main benefit to using your phone is that you can basically just point and shoot without worrying about focus on a DSLR.

Some features that I love for shooting on my own are:

  • Portrait mode: this is a great way to do a selfie with a small product, food and beverage, or accessory. You can tone down the level of blur in the background depending on your aesthetic.
  • Self timer: Alex only has so much patience, so this is a great way to snap pics when he’s working or I’m home alone.
  • Live photos: Combined with the self timer, this gives me the option of multiple images over 1.5 seconds so I can choose the best shot.

5. Get equipment that works for your needs

While you don’t need equipment, there are some key pieces you can buy to really level-up your pic game. This list below will cost you about the same as a two hour session with a pro photog — and you can use it for as long as you’d like.

6. Shoot a variety of micro and macro images

Keep your feed and website interesting by shooting and posting a variety of images with different zooms. Post images that show details or branding, and then zoomed out lifestyle and more landscape images.

Just as headers and changing font sizes help a reader digest smaller pieces, a variety of image perspectives helps a viewer stay engaged.

7. Have a consistent post-production routine

At the end of the day, your images tell your brand story. Be sure to stay consistent with your brand feel from thinking up shoots to adding filters. Your audience and customer should have the same feelings from seeing you online, to chatting with you on the phone and to walking into your space. Colour, lighting, prints, and so many more aspects go into telling that story, so be as consistent as possible.

I hope this helped! Let me know in the YouTube comments section if there’s anything I can help you out with further.

Top tips to refine your cover letter

My last post was all about the dos and don’ts of resumes; today let’s build off of that dream job momentum and talk about cover letters. Cover letters are an essential part of the application process, but tons of people miss this golden opportunity to stand out. 

The goal for your cover letter is to introduce yourself to the hiring manager as a pre-interview, and should be treated that way. It’s a fine balance between standing out and being professional.

Here are some kick-ass tips and tricks that will get you the face-to-face interview that you so deserve. Let’s get you that interview!

*Scroll to the bottom of this page to watch the video*

1. Use a template — but only as a guideline.

A template is a great starting point, so as I suggested for your resume, create a master document. In order to show you’re keen on each job and not simply applying to multiple companies en masse — tweak!

Use this opportunity to give examples about your work history, goals, and values that align with what they’re looking for. Speak about when you were first introduced to the brand and why you were attracted to working there.

2. Clearly state your name and contact information.

As you would with your resume, make this very clear. Put your name and contact at the top of the document where there’s not cluttered text or graphics around it. The right corner is a great place for this.

3. Address the correct person.

Who will be reading this cover letter? Make use of your LinkedIn. “Dear Sir or Madame” or “Dear Hiring Manager” are very sleepy.

4. Highlight the role you’re applying for right away.

Call out the role in the first sentence — save the reader time and energy. Show them you know what you’re applying for and don’t make them guess with filtering through stacks of resumes.

5. Don’t rewrite your resume in paragraph form.

This is the biggest mistake I see in a cover letter. Don’t simply reiterate your resume in sentence format. As I mentioned in point one, go deeper into how you align with your values and the brand. Your resume is a great way to highlight achievements, whereas, this is where you can show off your personality.

6. Be conversational, yet professional.

Use conversational, yet professional, words. Engage the reader the same way you would in an interview — like a human being. We often get caught up in jargon or floral words as we try to elevate ourselves, however, this can actually make you blend in and not get your point across.

7. Showcase how you’re personally aligned.

Highlight pieces from your resume that align with the company’s values. This is usually so easy it’s written in the job description. Mirror them. Give examples of how they align with you.

8. Show you’ve done your research.

Talk about a staff initiative, a recent partnership, or an impressive feat the company has tackled and what it meant to you or how it aligns with you. 

9. Focus on readability. 

Go for readability. Use new paragraphs, bullet points and bigger or bolded titles. Just as I’ve used a list and varying font size to make these 300+ words more digestible to you, do that for your reader. Be sure you maintain a respectable font size, though — don’t go too crazy.

10. Cut to the chase!

Keep it short — stop rambling!!!!!!! That’s all. 

11. Use the body of the email to drop your best asset.

If you have the email of the hiring manager, this is your opportunity to attach your cover letter and resume (in PDF!) with a stellar reason for them to open your attachments. If you could only say one thing, what would it be? An example: 

“My resume will show you my experience and credentials are a fit, but what excites me about this role is…”

One last thing… PROOFREAD! You have a spell-and-grammar check — use it. Read everything twice and then send it to a savvy friend who will also read it twice. 

You’re fabulous, so let’s make sure you get your foot through that door. 

I’d love to hear hiring manager feedback. What are you looking for in candidates? Candidates — were this post and video helpful for you as you navigate the job-hunting waters? Let us know in the comments below!

How to write a resume that gets you hired

Resume writing can be overwhelming — how do you stand out from hundreds of other applicants for that dream job? What do you share? What’s the balance of professionalism and approachability? Don’t worry. We’ve got you covered.

These tips will make sure your resume stands out and is actually read, snagging you the face-to-face meeting you deserve. In this post, we walk you through technical dos and don’ts, and also some layout tricks that increase readability and keep the hiring manager engaged in what you have to say. Let’s write a resume that gets you hired.

*Don’t feel like reading? Watch the video below.*

Use a template — but only as a guideline.

Find a template that works for you and your industry. If you’re a graphic designer, show that off a little. If you’re applying for a more black-and-white role, stick to something more traditional. If at all possible stick to one page — no more than two.

Use a professional font and size.

Use a reasonable font and size. No one wants to have to squint to read about you. And if you need the small font to keep things to the aforementioned one or two pages, it’s time to ruthlessly edit things down.

Clearly state your name and contact information.

Highlight who you are, and your contact information clearly. (This can include a professional headshot.)

Use your objective to humanize yourself.

Be straightforward in your objective. Include your WHY. This is a great place to humanize yourself.

Include interests that define who you are.

This could be in a side column entitled “interests” or simply be included in your objective. Find a place to include your interests outside of the workplace. What will water-cooler talk be like with you? Do you enjoy mountain biking? Spending time with your kids? Do you have a favourite author?

Only highlight relevant job experience.

Only list the positions that apply to the job. Maybe a similar role at a different company, maybe a company with a transferable skill set.

Feel free to include positions that you were at for an extended time simply as a list, not with full detail.

Expand on the value you added in your previous work.

Don’t overindulge in the write-ups. If you were a retail sales associate that’s great, we know you sold clothing. Tell us about the targets you hit, tell us about your awards as employee of the month, or the promotions you got while you were there. Simply doing your job isn’t enough, tell us why you were great at it. Things that relate to this position.

Be concise and conversational.

Keep the language conversational, yet professional. This is a balance that transfers over from your cover letter.

List key education and achievements.

Along with your education and GPA and honours, include awards that align with the company and/or position. Don’t be afraid to list certificates or further learning other employers have put you through. (If you’re worried about document length, a great space-saver is to take out your high school education.)

Demonstrate how the position aligns with your goals.

If applicable, share your goals for the future. 

And… most importantly…

Proofread, proofread, then proofread AGAIN.

The main goal of your resume is to highlight who you are and why you’re a good fit for the role. It ultimately boils down to company culture and values. I often talk about being human in a digital world, and a written piece of paper is no different.

I hope this blog post and video have been helpful for you. If you have any questions or want to share another great resume tip, pop them in the comments below!

(Pssst! If you need some help with your cover letter, head over to this video.)

My strategic content calendar template

A strategic content calendar is the key to being proactive in your marketing efforts. It ensures you get the most out of every piece of content you create, allows you to build sales funnels that work, and most importantly, frees up your posting time to actually engage and grow your business.

Below is my simple, easy-to-grow content calendar strategy. But before getting started, make sure you identify YOUR MAIN GOAL. It may vary from platform to platform, and you may have multiple KPIs to hit, but make sure your content is working in favour of your business goals. There’s no point spending your time creating beautiful, eloquent content that does diddly-squat for your business.

1. Stick to a strategy date

It doesn’t matter if you’re scheduling one week or one year of content at a time, you need to carve out a date that works for you (and your team) to strategize about the next round of content to align with your goals.

I usually work on a one-month calendar, so I carve out a Monday or Tuesday afternoon in the third week of each month to plan out the month ahead.

2. Note any important dates

Highlight any pending dates of importance. These could be massive holidays that you’ll have lots of content around, like Christmas or back to school. Or, smaller dates that align with your company’s MO, like Earth Day for a company with sustainability at its core.

While the new addition of silly dates like “donut day” or “margarita day” might be tempting to hit, if you aren’t a donut shop or restaurant these days will look like you’re forcing content. Be sure you aren’t forcing that content.

Remember: creating content is like a fart, if you have to force it it’s probably $#!*.

3. Identify opportunity for messaging and engagement

This seems similar to point two, but the difference is that we dig a little deeper into our business strategy. Mark down launches, days you’ll be closed or have extended hours, events you have coming up, or other announcements.

This is where you’ll weigh your content and see where you’ll make noise, how often, and over how many days. 

4. Work backwards

You mapped out all your important dates in 3, now you work backwards. What do you want to say for each special date? How many times will you post about it? What creative and copy need to be compiled?

5. Fill the gaps with evergreen content

Once you can clearly see the flow of content, it’ll be easy to see where the gaps are. In your content strategy, you should have outlined how many days a week you’d like to post on each platform. Identify where you need more, and fill that with evergreen content.

Evergreen content is anything that isn’t seasonal and can be shared at any time. This is a great place to share brand stories, introduce the backstory and “WHY” of your brand, show the team and culture, or anything else that doesn’t date.

6. Create the content

Now that you’ve identified what needs to be created and when it needs to be done, you can either get cracking or delegate to team members responsible for different aspects of the work. If team members are working on the same content for different platforms (for example, one is doing the social and one is doing the blog) make sure they’re working to create a cohesive story.

7. Get every last drop out of your content

Beyond getting a cohesive story X-platform, make sure that you’re squeezing every last drop out of your content. Use the same images simply resized for different placements on social, EDMs, and blogs. Split blogs into digestible stats and soundbites that can be shared and saved on social. (Sorry, for the major alliteration there…) Share the same pieces of content multiple times depending on the platform. For example, breaking a blog down into 5-10 tweets is totally OK since tweets don’t live for very long.

Also, don’t forget about the past content you’ve created. Share older links when it makes sense and reshare stats that still apply. Each year on Father’s Day I share my What’s the Opposite of Daddy Issues blog because it still gets traction and I don’t have to spend the few hours writing and building out creative for it.

8. Use a scheduling tool

There are plenty of tools available, with prices ranging from free all the way up to thousands per month. Figure out what your needs are and find a program that helps you “set it and forget it.”

The biggest benefit of a scheduling tool is that you now don’t have to waste time posting each day, and instead you can engage with your audience, answer questions, and open the lead-gen floodgates.

***

Of course, the strategy is only one piece of the pie. I’d love to know what challenges you face when it comes to actually creating the content. What are your biggest hurdles? Is it imagery? Writing the copy? Getting your audience to take action? Let me know so I can cover it down the road.

SEO Checklist: Easy steps to searchable content and web traffic

SEO makes the world go round! Okay, not really. But it is SUPER important for attracting the right customers and traffic to your business. People open a new search tab to solve a problem, and you (yes, you!) can be there waiting with a solution. Today, I’m sharing the exact SEO blog checklist that I use when writing content for clients or my own personal blog.

The BW SEO blog checklist

  1. Identify your focus keyword.

2. Choose three supporting keywords.

3. Include your keywords in the title, opening sentence, URL, and meta description.

4. Organize your topic into five paragraphs or sections:

  • Intro: Tell the reader what you’ll talk about and what they’ll learn by the end of the piece.
  • Point 1: Include a keyword and supporting keywords as often as possible.
  • Point 2: Throw in a stat or a quote.
  • Point 3: Get into detail and show your expertise.
  • Conclusion: Mirror the intro, while reiterating your learnings. Remember to add a CTA to connect back with you to learn more.

5. Hyperlink your content to internal links (other places on your site) and external links (to other sites) that support your points and increase your engagement.

6. For images, be sure to use a lightweight file that keeps load speeds moving along. And, be sure to add alt text to the backend of your images. This gives you another opportunity to plug those keywords and also helps Google index your content.

*Watch the video below for even more SEO insights!*

I use these simple steps to drive B2B acquisition in complex industries like tech and finance, with topics that are definitely not in my wheelhouse. But it’s also great for straight-to-consumer products or for other brands that want to be discovered through search. Copy and paste this SEO blog checklist into a word doc for your reference!

Need more help with your website SEO, or looking to outsource marketing copy? Let’s chat and come up with a personalized plan that works for you and/or your biz.

Privacy Settings
We use cookies to enhance your experience while using our website. If you are using our Services via a browser you can restrict, block or remove cookies through your web browser settings. We also use content and scripts from third parties that may use tracking technologies. You can selectively provide your consent below to allow such third party embeds. For complete information about the cookies we use, data we collect and how we process them, please check our Privacy Policy
Youtube
Consent to display content from - Youtube
Vimeo
Consent to display content from - Vimeo
Google Maps
Consent to display content from - Google